


Are you a mom of girls who is tired of seeing all of your daughter(s) hair accessories turn into one combined mess in a drawer? Do you find DIY projects overwhelming? Hi, I’m that mom too! This is why I am sharing this simple DIY hair accessory organizer you can make without breaking the bank!
After moving to our new home, I found a box filled with all of my girls’ hair accessories in a complete total messy chaos. It was hard to find the color or design my kids were looking for. I was in search of a simple solution to organize all the hair accessories.
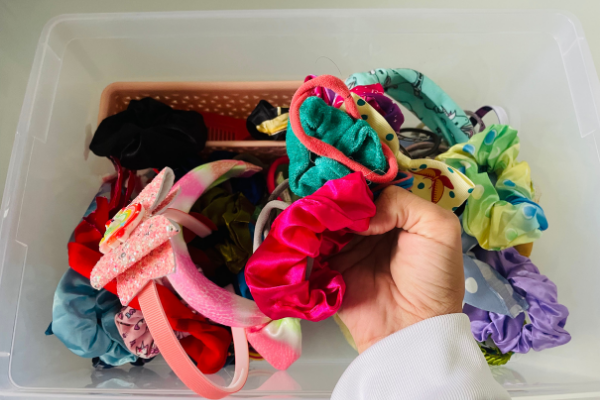
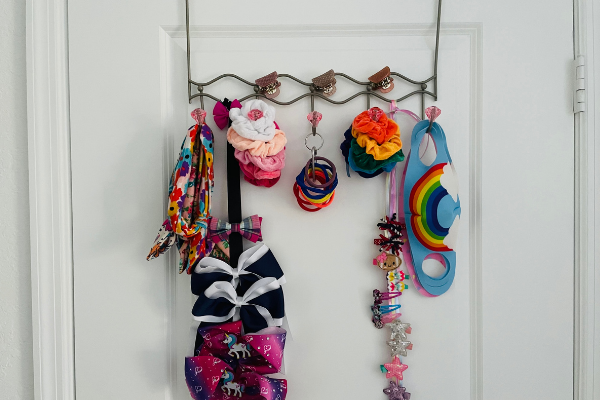
It took a well-earned shower at the end of the day to finally get a lightbulb moment! The idea was that I could use an over-the-door towel hanger as a hair accessory organizer.
In the past, I tried to buy the organizational sectionals, but they wouldn’t last very long, especially in the hands of my girls.
My girls would take the sectionals and use them for their dolls or place other things in them. So I needed to find something they are not able to reach, that I can still keep organized. And so after watching quite a few tutorials, I decided to make my own hair accessory organizer for my girls.
Don’t let “DIY” discourage you from trying this activity.
If you are like me and feel like you cannot handle the “DIY stuff” because of lack of time, patience, and supplies always try to look for quick, easy, inexpensive, and small space organizational-friendly DIYs.
Here are some supplies that come in handy when creating a DIY hair accessory organizer:
- Over the door hook hanger or accordion wall hook hanger (small to medium size)
- Ribbon/yarn or birthday streamer
- Carabiner clip
- Scissors
Note: You can add more if you are feeling creative, but because I was in a time crunch and trying to avoid a glue gun, I came up with the above supplies!
Step One: Assess the over-the-door hook hanger or accordion wall hook hanger.
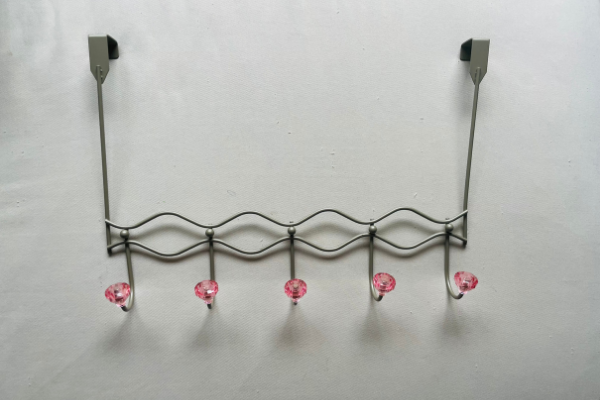
FYI: This over-the-door hook hanger was purchased from Burlington, but you can also find it at stores such as Target, T.J. Maxx, and Ross Dress for Less.
Step Two: Decide how many ribbons for hair clips you would like to use.
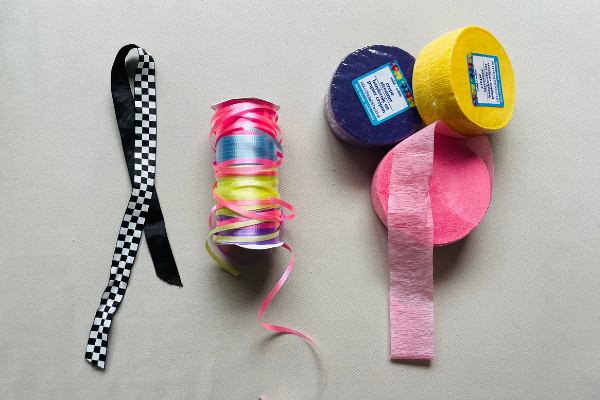
Note: You can use any type of ribbon, yarn, or even a birthday streamer to hold clips.
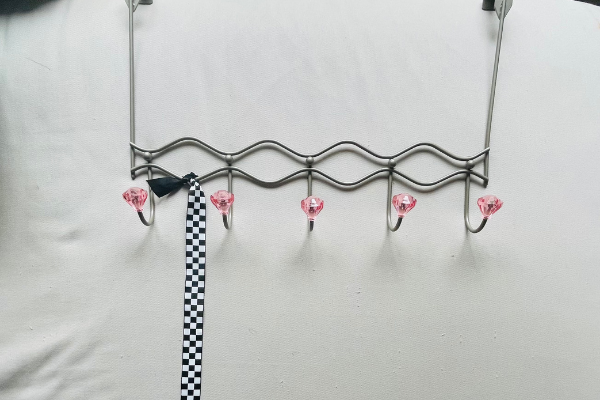
Then tie it up onto the door hanger. Remember, you can use any color ribbon or pattern. In the above picture, I chose a ribbon we received from a birthday party souvenir since it was what I already had at home.
When ready, begin to add hair clips as desired.
Step Three: If you have a carabiner clip and a key chain loop, attach them together so that they can hold and group hair ties together.
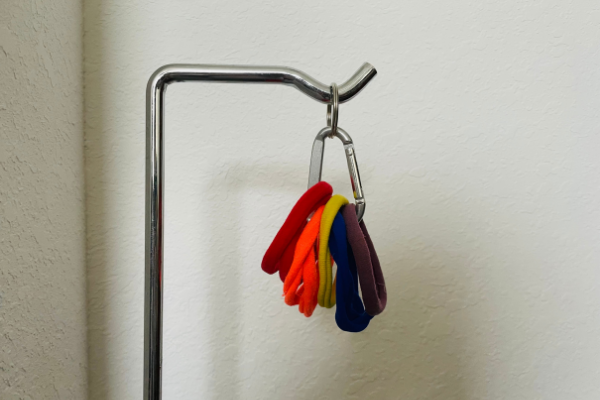
Want to get fancy? Group the hair ties by color! Add as many carabiner clips as necessary to the door hanger.
Step Four: Use the wall hooks to group the scrunchies, headbands, etc. together.
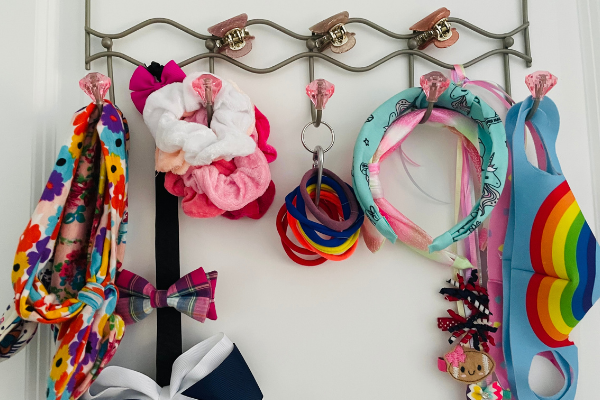
Note: You can also use the wall hooks to hang clean reusable masks too.
Step Five: Admire your work! Voila! Done!!!
Piece of cake right?
If you are inclined to get in touch with your creative side even further, you can use ribbon and a hot glue gun to create patterned loops. Once that is dry, you can store your headbands within each loop too.
You can also use yarn to create a braid or Unicorn tail to hold hair clips and even headbands. The sky is the limit when it comes to your creativity. But if you are in a pinch and looking to get organized quickly, try this DIY activity, tag @miamimomcollective, and show us your fabulous hair accessory organizers!
Have more creative ideas to add and share? Please share with us in the comments below! Enjoy, have fun, and can’t wait to see your hair accessory organizers!


I really love this so much. I have so many hair accessories for the baby and they are odd sizes and shapes. This would be perfect to hold her accessories and make them easy for me to grab.
Comments are closed.