


The holidays are officially here and I couldn’t be more excited! We’re going back to the motherland (AKA: Alabama) for Christmas this year and my heart is literally exploding with excitement! Sweet cousins playing together plus all of my favorite Southern foods will make for the most perfect Christmas.
I’ve been thinking a lot about Christmas lately. Memories from years past and new traditions that I’ve been planning since Gaby was first born. One of the traditions I’ve had planned for the last three years is to make Old Fashioned Christmas Ornaments with her.
I grew up making these ornaments. It was the highlight of every Christmas as a child. There was nothing better than helping Mom make the dough. We rolled it out together and had every Christmas cookie cutter known to man ready to make ornaments. Personally, my favorite part was painting the ornaments. So much fun and so many memories we had sitting around the dining room table talking and laughing, all while making ornaments together.
As we got older, the tradition continued, but things got a little bit more interesting! Instead of making the typical candy cane, Santa Claus, or snowman ornaments, we started making ornaments according to what happened during that particular year!
I cannot even begin to tell you how much fun it is to pull out ornaments from 10 years ago and remember everything that happened in that year just by the ornaments that were made! For example, the year I graduated Culinary school I made a Chef’s knife and a really weird looking spatula. And the year Omar and I got engaged I made a big diamond ring and a wedding dress! You get the picture, right?!
Side note: If you have small kids and you need some cookie cutters (like I did), check these out! I ordered them off Amazon and Gaby LOVES them. They’re perfect for cookies and ornaments!
All of this to say, Gaby has finally reached an age where I think she’s going to love this family tradition. We had so much fun making these this week! Being in the kitchen with her is time that I treasure so much. We have the sweetest conversations and she asks the most innocent questions that literally make me melt.
Okay, let’s chat about this dough!
You only need 3 INGREDIENTS plus a little can of Polyurethane. I buy the kind that you paint on the ornaments because the smell isn’t very strong like the kind in the spray can. Why use Polyurethane, you may be wondering? This will keep your ornaments from molding throughout the years. Nobody wants to open up Christmas boxes that have been in storage or your attic all year long only to find your most treasured memories completely molded. Use the Polyurethane!
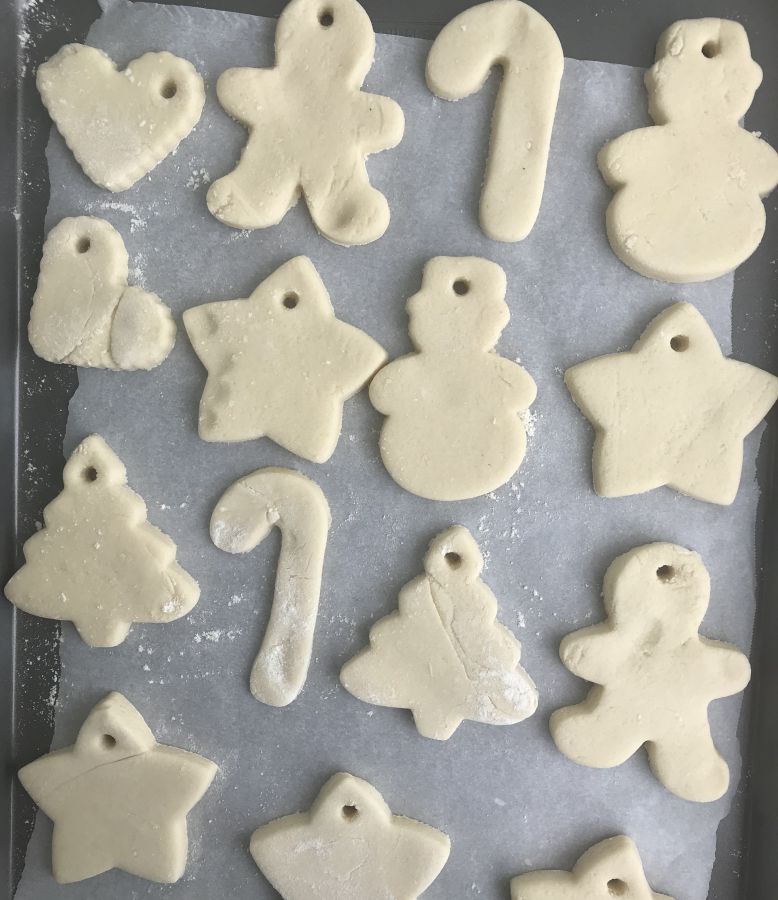
Run to Walmart (or a grocery store) and buy the cheapest bag of flour and a cheap container of table salt. Next, all you need is water! Mix all of this together in your standing mixer with a dough hook. Once the dough comes together, roll it out! The thickness of the dough, when rolled out, doesn’t really matter. You want it to be thick enough to not break easily. Typically, mine are 1/4 – 1/2 inch thick depending on what I’m making!
Now, this next step is crucial. Make sure you use a toothpick or a nail (even a knife) to poke a hole somewhere in the ornament so you can either run a ribbon through it or a hook to hang it on your Christmas tree. Bake low and slow until golden and hard. Then let them cool completely.
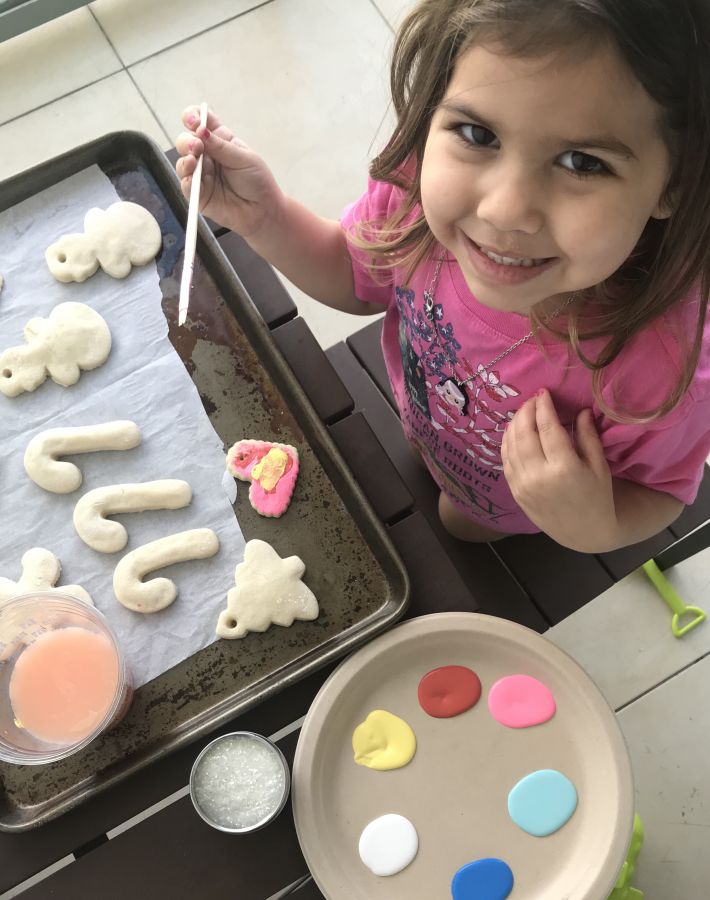
 I love to pull out the paints and glitter for these. My suggestion is this: do this part where a mess can be made! Trust me – a mess will be made! If you have a 3-year-old, your paint may end up looking like this!
I like to go ahead and put a hook through the ornament and then paint a thin layer of the Polyurethane all over each ornament – front and back. Then you can hang the ornaments on a drying rack and let them dry for several hours.
Now that they’ve dried hang them on your Christmas tree! I like to write names and dates on the back of them, too.
Once Christmas is over I add all of my dough ornaments to a gallon size Ziplock bag and box them up for next year! If you make these, I would love to hear about it. Go make some fun memories, and have a wonderful Christmas!
Here’s the recipe for my Old Fashioned Christmas Ornaments:
- 4 cups flour
- 2 cups salt
- 2 cups water
- Polyurethane
Directions:
- Preheat the oven to 250 degrees and line a couple of sheet pans with parchment paper; set aside.
- In a standing mixer with a dough hook, add the flour and salt. Mix together.
- While the mixer is running on low speed slowly add the water a little bit at a time. You may or may not need all of the water.
- When the dough comes together roll it out on a lightly floured surface. You want the thickness of the dough to be thick enough to not break. I roll mine out to 1/4 – 1/2 inch thick depending on what I’m making.
- Poke holes in the ornaments so you can run a ribbon or hook through them.
- Bake for 60 – 90 minutes; or until golden and hard. You don’t want these to be soft at all.
- Let them cool completely on a cooling rack.
- Paint and glitter if desired, and let dry.
- Paint a thin layer of Polyurethane all over each ornament (so they don’t mold).
- Hang the ornaments and let dry for several hours.
- Store in a gallon size Ziplock bag.
– Whitney
PS… After Gaby painted 3 ornaments, ADD kicked in and she was ready to eat cookies! 🙂


