


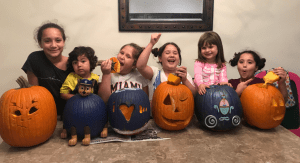
Pumpkin carving has always been a family tradition in our household. All the cousins come over and we get to do something fun with the kids. Somehow us adults end up with most of the hard work but it’s always worth it in the end.
Over the years we’ve had some pretty cool carvings and some complete fails! As always, we’ve learned the most from our mistakes. I’m excited to share some tips and tricks to make your carving experience easier with the kiddos as well as make your pumpkins last longer.
-
Clean your pumpkins.
As insignificant as this may seem this should always be your first step before carving. Wash your pumpkins with soap and water or wipe them down with a wet cloth. This will help remove microbes that tend to rot the pumpkin and will also help it last a little longer. Also, it’s cleaner for your little ones who tend to stick their hands and basically anything else they can find, in their mouths.
-
Open the pumpkin from the bottom instead of the top.
Have you ever carved a pumpkin and days later find the sides caving in? This has happened to us plenty. Carving the pumpkin from the bottom prevents this from happening. This method also makes it easier to slip candles under and light up your pumpkin.
-
Scoop and scrape the walls.
Now the part my kids love the most. Getting dirty and scooping out the seeds and pulp. It is great to get in there and scrape the walls from the inside. Most pumpkins have thick walls and thinning out your pumpkin allows for the light to shine through your design. Having a clean pumpkin on the inside also reduces the time of decay of the pumpkin. And if you’re like my mother-in-law, who loves pumpkin seeds, you can separate the seeds for roasting. These can be used to make a yummy treat.
-
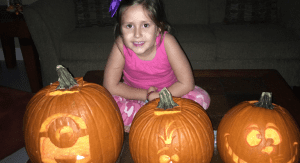
Plan your design before carving.
Planning your design and having a template ahead of time makes it easier to work on your pumpkin vs freestyle. You can find tons of designs to download off the internet. We have even found some pretty cool stencils included in our kids’ carving kits. They aren’t too pricey and can usually be found at your local Walmart or Target. When you’re done carving/painting, you can use hairspray to not only set the paint but help your pumpkin last a little longer.

-
Have fun!
Most important tip of all. Just have fun! Make a fun night of it with all your friends and family. Or if your children are a little younger, maybe you can have a single-family pumpkin where everyone can do bits and pieces. Our younger girls actually like to paint their pumpkins and make them characters which is also a great idea.
Can’t wait to see all your beautiful pumpkins Mommas! Don’t forget to share and tag @miamimomcollective.


